Here, you can practice writing the letters of the alphabet. It's helpful for two reasons:
- it reinforces the shape and size of each letter, and
- you'll get comfortable with both uppercase and lowercase letters.
You can practice by tracing the letters with your finger on your device screen. This is especially important for English learners and those with learning disabilities.
As you practice, notice the size of each letter in relation to the page lines. Uppercase letters span the whole vertical space between the lines. Most lowercase letters do not. Practice not only the correct line segments but good proportions as well. Also, be sure to notice when a letter has a "tail" that must go below the line. Careful practice now will result in casual accuracy later.
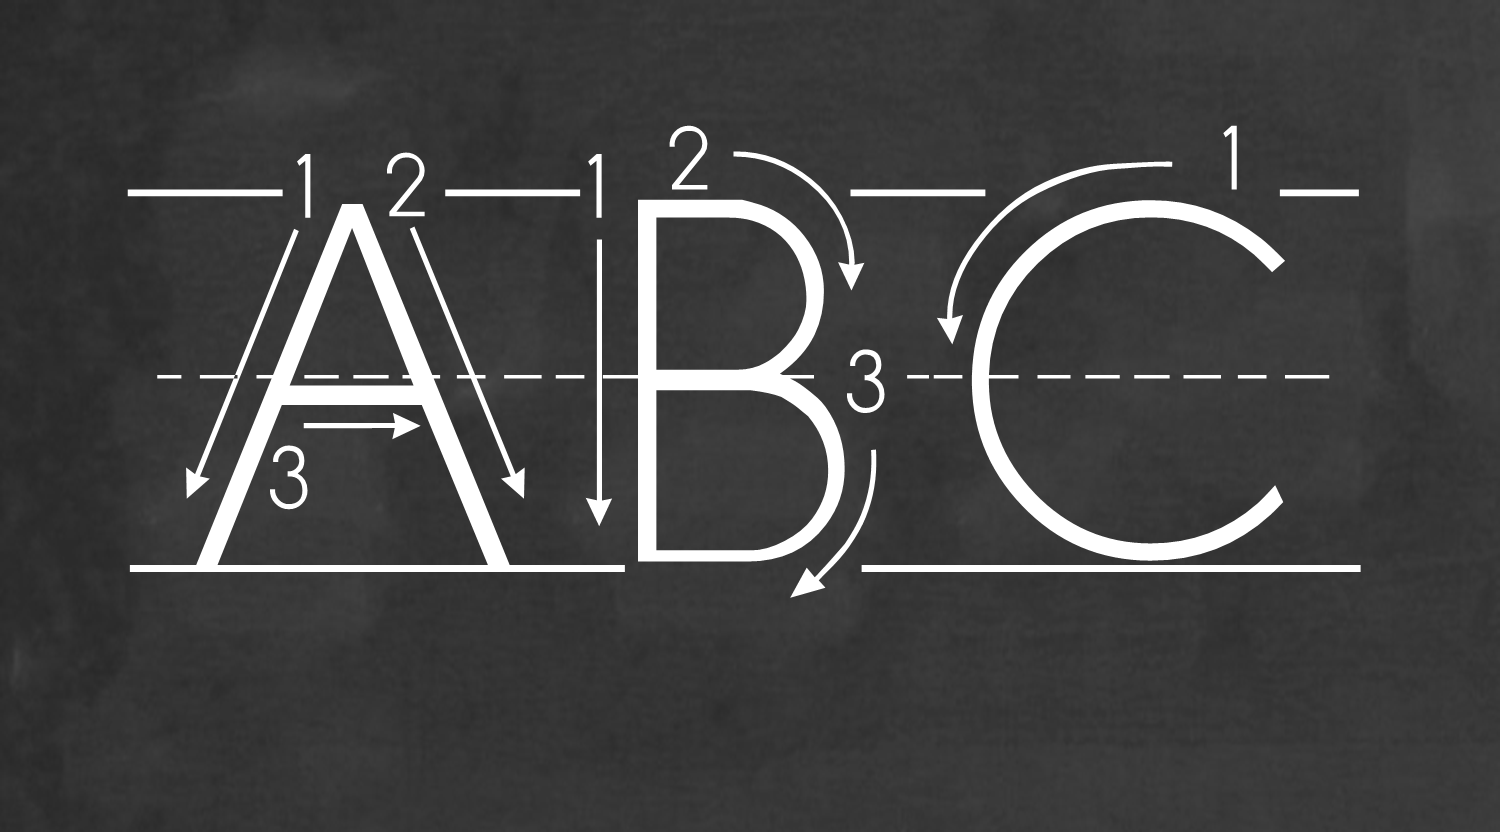
Each of the following symbols illustrates how a letter should be written. For each one, begin at #1; then follow the arrow direction to make the first line stroke of the letter. Write line stroke #2 in the direction of the arrow. Move to #3, and so forth until you have completed all the strokes of the letter. Remember to say the letter name as you write each line stroke. Repeat each letter as many times as you think you need. Everyone learns at their own rate.
For even better practice, get our Step 1: Learn the Symbols practice packet.
After you have practiced writing the letters several times, you should be prepared to move on to Step 1.4 to review.
